Introduction: Elevating Your Coffee Experience
At we, we understand the significance of a well-maintained coffee maker. A clean machine not only ensures the longevity of your appliance but also guarantees the flavor integrity of your beloved brew. While many traditional cleaning methods rely heavily on vinegar, we recognize that some individuals prefer alternatives due to personal preferences or allergies. Fear not, as we unveil the secrets to cleaning a coffee maker without vinegar, ensuring your morning ritual remains pristine and undisturbed.
The Vinegar-Free Solution: A Comprehensive Guide
Understanding the Importance of Cleaning
Before delving into the specifics of vinegar-free cleaning methods, it’s crucial to grasp the significance of maintaining a clean coffee maker. Over time, mineral deposits, coffee oils, and residue accumulate within the machine, leading to a decline in performance and flavor quality. Neglecting regular cleaning not only affects the taste of your coffee but also poses health risks due to bacterial growth. By adopting a proactive approach to cleaning, you can safeguard both the functionality and taste of your coffee maker.
Step-by-Step Cleaning Instructions
1. Gather Your Supplies
To embark on your vinegar-free cleaning journey, assemble the following supplies:
- Baking Soda
- Water
- Soft Brush or Cloth
- Dish Soap
2. Prepare the Cleaning Solution
Begin by creating a gentle yet effective cleaning solution using baking soda and water. Mix approximately two tablespoons of baking soda with one quart of water, ensuring thorough dissolution.
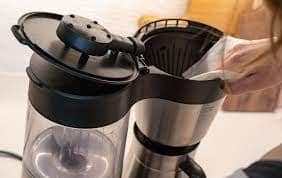
3. Disassemble and Clean Removable Parts
Carefully disassemble your coffee maker, removing any removable parts such as the carafe, filter basket, and reservoir. Submerge these components in the prepared cleaning solution, allowing them to soak for at least 15-20 minutes.
4. Wipe Down Exterior Surfaces
While the removable parts soak, dampen a soft brush or cloth with the cleaning solution and gently scrub the exterior surfaces of the coffee maker. Pay close attention to any areas prone to buildup or stains, ensuring a thorough clean.
5. Rinse and Reassemble
After the soaking period, thoroughly rinse each component under running water to remove any traces of the cleaning solution. Once rinsed, carefully reassemble the coffee maker, ensuring each part is securely in place.
6. Run a Cleaning Cycle
Fill the reservoir with fresh water and add a small amount of dish soap. Run a brewing cycle without coffee grounds to flush out any remaining residue or cleaning solution.
7. Final Rinse and Dry
Once the cleaning cycle is complete, discard the soapy water from the reservoir and rinse it thoroughly with fresh water. Wipe down all surfaces with a clean, dry cloth, ensuring no moisture remains.
Maintaining Optimal Performance
To prolong the cleanliness and functionality of your coffee maker, we recommend incorporating regular cleaning into your routine. Aim to clean removable parts weekly and perform a deep clean with the vinegar-free solution every 1-2 months, depending on usage frequency.
Conclusion: Elevate Your Coffee Experience with Vinegar-Free Cleaning
In conclusion, we have unveiled a comprehensive guide to cleaning a coffee maker without vinegar, empowering you to maintain a pristine machine and elevate your coffee experience. By embracing alternative cleaning methods, you can ensure optimal performance and flavor integrity without compromising personal preferences or allergies. Cheers to enjoying delicious, freshly brewed coffee every morning, courtesy of your immaculately clean coffee maker.