Introduction:
Deck flashing is a crucial component in ensuring the longevity and structural integrity of your deck. Proper installation of deck flashing serves as a barrier against water damage, preventing issues such as rot, decay, and corrosion. This comprehensive guide will take you through the step-by-step process of installing deck flashing to help you create a robust and long-lasting deck structure.
Understanding the Importance of Deck Flashing:
Before delving into the installation process, it’s essential to grasp why deck flashing is a critical element in deck construction. Deck flashing acts as a protective barrier, preventing water from infiltrating the areas where the deck connects to the house or other structures. This, in turn, safeguards against potential damage caused by moisture, such as wood rot, decay, and the deterioration of fasteners.
Gathering the Necessary Tools and Materials:
Ensure you have all the required tools and materials before starting the installation process. Common items include:
- Deck flashing material (typically made of metal or PVC)
- Measuring tape
- Tin snips or a utility knife
- Caulk gun and high-quality exterior caulk
- Deck screws or nails
- Screwdriver or nail gun
- Level
- Safety gear (gloves, safety glasses)
Preparing the Deck Surface:
Before installing deck flashing, inspect the deck surface to ensure it’s clean and free of any debris. Remove any existing flashing if necessary. Clean the surface thoroughly to promote proper adhesion of the new flashing.
Measuring and Cutting the Flashing Material:
Accurate measurements are crucial for effective deck flashing. Use a measuring tape to determine the lengths needed for each section. Cut the flashing material using tin snips or a utility knife, ensuring precise and clean edges.
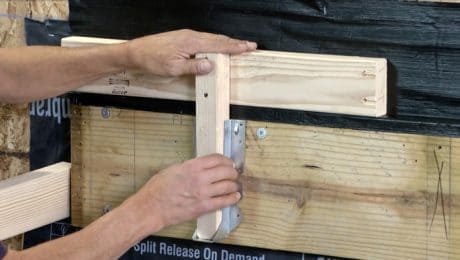
Installing the Deck Flashing:
- Start with Ledger Flashing: a. Place the ledger flashing against the house where the deck attaches. b. Ensure the flashing extends past the ledger board and covers the top of the ledger. c. Attach the ledger flashing using deck screws or nails, securing it at regular intervals.
- Install Joist Flashing: a. Cut joist flashing pieces to fit between each pair of joists. b. Slide the joist flashing over the joists, allowing it to extend past the ledger. c. Secure the joist flashing with screws or nails, making sure it’s tightly sealed.
- Apply End Flashing: a. Cut end flashing pieces to fit the width of the deck. b. Install end flashing along the perimeter of the deck, securing it with screws or nails.
- Seal Joints with Caulk: a. Apply a high-quality exterior caulk to seal the joints and edges of the flashing. b. Ensure a watertight seal by smoothing the caulk with a caulk gun or putty knife.
Checking for Level and Proper Alignment:
Use a level to ensure that the flashing is installed evenly and follows the natural slope away from the house. This promotes proper water drainage and prevents pooling.
Final Inspection and Maintenance Tips:
Conduct a thorough inspection of the entire deck flashing installation. Check for any gaps, loose fasteners, or areas that may require additional caulking. Additionally, periodically inspect and maintain the deck flashing to address any wear and tear over time.
Conclusion:
Proper installation of deck flashing is a crucial step in building a durable and long-lasting deck. By following this comprehensive guide, you can ensure that your deck is well-protected against water damage, contributing to the overall stability and longevity of your outdoor living space.