Introduction:
The Swiffer WetJet is a popular and efficient tool for keeping your floors spotless, but to make sure it operates smoothly, it’s crucial to know how to correctly install batteries. This comprehensive guide will walk you through the step-by-step process, ensuring that you can effortlessly maintain a clean living space.
Gather Your Materials:
Before you begin, gather the necessary materials. You will need:
- Swiffer WetJet
- Batteries (check the manufacturer’s recommendations for the correct type and quantity)
- A clean, flat surface
Locate the Battery Compartment:
Turn your Swiffer WetJet upside down, exposing the underside of the device. Look for the battery compartment, typically situated near the front or back of the device. It is usually secured with a latch or screw.
Open the Battery Compartment:
If your battery compartment has a latch, press it to release the cover. If it has a screw, use the appropriate screwdriver to loosen and remove it. Carefully open the compartment to reveal the space for the batteries.
Check Battery Polarity:
Most battery compartments have markings indicating the correct polarity for the batteries. Look for symbols such as “+” and “-” or words like “positive” and “negative.” It’s crucial to align the batteries correctly to ensure proper functioning of the Swiffer WetJet.
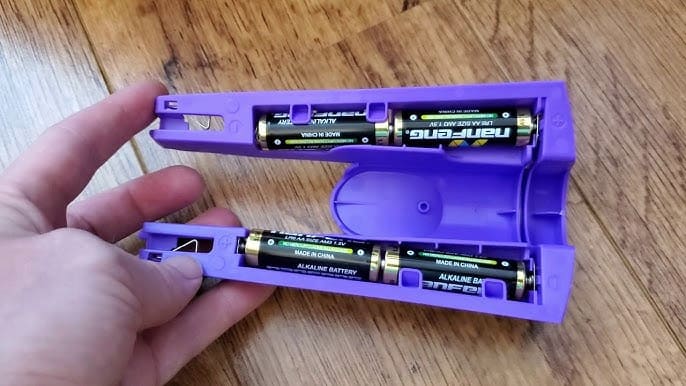
Insert the Batteries:
Take the batteries and insert them into the compartment according to the indicated polarity. Usually, the positive end (+) should be placed against the corresponding positive marking, and the negative end (-) against the negative marking. Ensure a snug fit for each battery.
Close the Battery Compartment:
Once the batteries are correctly placed, close the battery compartment securely. If there’s a latch, press it until it clicks into place. If you used a screw, tighten it back in.
Test the Swiffer WetJet:
With the batteries securely installed, flip the Swiffer WetJet back to its upright position. Press the power button to see if the device powers on. If the indicator light or any other display functions, it indicates that the batteries are properly install.
Dispose of Old Batteries Properly:
If you replaced old batteries, dispose of them according to local regulations. Many communities have designated recycling centers for proper battery disposal to minimize environmental impact.
Conclusion:
Congratulations! You’ve successfully installed batteries in your Swiffer WetJet, ensuring it’s ready for efficient cleaning. Regularly check and replace batteries as needed to maintain optimal performance and keep your floors sparkling clean.