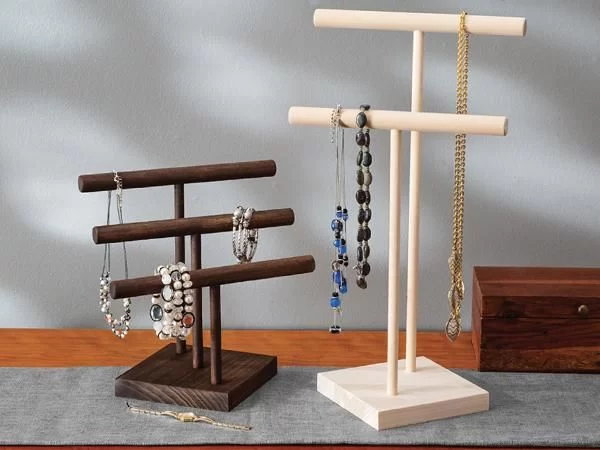
Creating Your Own DIY Wooden Jewelry Holder
If you are like me, your jewelry collection is constantly growing, and you’ve probably found yourself digging through tangled necklaces and mismatched earrings on more than one occasion. Frustrated by the clutter, I decided to take matters into my own hands and build a simple, yet beautiful wooden jewelry holder. This DIY project not only helped me organize my accessories but also added a touch of rustic charm to my room. In this guide, I will walk you through each step of creating your own wooden jewelry holder from scratch. Trust me, it’s easier than you think!
Why Choose a Wooden Jewelry Holder?
Wooden jewelry holders offer a perfect balance of style and functionality. Whether you’re looking to display your favorite pieces or keep your daily wear organized, a wooden holder will do the job while adding a rustic or minimalist vibe to your space. Personally, I love the warmth that wood brings to a room, and building it yourself can be incredibly satisfying. Plus, it's a fun and creative project that allows you to personalize it exactly how you want!
The Materials You Will Need
Before we get started, let’s gather the necessary materials. The beauty of this DIY project is that you can find most of the materials at your local craft store or hardware store. Here’s a simple list of what you’ll need:
- Wooden plank (choose a wood type that suits your style, like pine, oak, or cedar)
- Screws or nails
- Wood glue
- Hooks (for necklaces, bracelets, etc.)
- Small trays (for rings, earrings, etc.)
- Sandpaper (to smooth the edges and surface)
- Wood stain or paint (optional, if you want to personalize the wood’s finish)
- Tools: Saw, hammer, drill, screwdriver
How to Choose the Right Wood
The type of wood you choose can dramatically affect the look of your jewelry holder. For example, pine gives a light, airy feel, while oak gives a more traditional, classic appearance. If you're going for a rustic look, reclaimed wood can be a great option. I personally love the character and warmth that a distressed wood finish provides, but you can go with any style that suits your home decor.
Step-by-Step Instructions
1. Measure and Cut the Wood
The first step is to determine the size of your jewelry holder. I recommend a length of about 12 to 16 inches and a height of 8 to 10 inches, but you can adjust the dimensions based on your space and needs. Use a saw to cut the wooden plank to your desired length. Don’t worry if the edges aren’t perfect – that’s part of the charm of a handmade piece!
2. Sand the Wood
Once your wood is cut to size, use sandpaper to smooth the edges and surface. This step is important not only for the finished look but also for preventing splinters. Sanding is one of those steps that makes a huge difference, and trust me, you’ll be glad you took the time to do it.
3. Attach the Hooks and Trays
Next, measure and mark where you want the hooks for your necklaces, bracelets, and other hanging pieces. Typically, I space them about an inch apart. Use a drill to create small holes and then screw the hooks in. For the trays, I used small wooden boxes that I attached to the bottom of the board. These are perfect for holding rings, earrings, or other small items. Use wood glue and screws to secure them in place. Ensure everything is level and evenly spaced!
4. Add a Finishing Touch
Now comes the fun part – giving your jewelry holder a unique touch. You can either stain the wood to enhance the natural grain or paint it in a color that matches your room’s theme. If you’re going for a rustic look, try using a dark stain or distressing the wood for a vintage feel. If you prefer a minimalist style, opt for a sleek white or gray finish.
Personalizing Your Wooden Jewelry Holder
One of the best things about making your own jewelry holder is the opportunity to make it truly yours. If you're crafty, you can add embellishments such as carved designs, painted patterns, or even fabric accents to the trays. I decided to add a little personal touch by painting the bottom of my trays with a fun geometric pattern. It’s a simple way to elevate the look of your holder and make it feel even more unique.
Choosing the Right Placement for Your Holder
Once you’ve completed your jewelry holder, you’ll want to find the perfect place for it in your home. Personally, I placed mine on my bedroom wall above my vanity. It’s easy to grab a necklace or bracelet while I’m getting ready in the morning. You could also mount it on the inside of your closet door or hang it on a pegboard for easy access. The possibilities are endless!
Final Thoughts on Building Your Wooden Jewelry Holder
Building a DIY wooden jewelry holder is not only a fun and rewarding project, but it’s also a great way to stay organized while adding a personal touch to your home. Whether you’re a beginner or a seasoned DIYer, this project is simple enough to complete in an afternoon and will provide you with a functional, beautiful piece that you can be proud of. If you’re looking to add more DIY projects to your home, I highly recommend experimenting with different designs and finishes to match your style!
Building your own wooden jewelry holder is a wonderful way to combine creativity, practicality, and craftsmanship. With just a few basic tools and materials, you can create something that not only helps you stay organized but also adds charm and character to your space. Happy crafting!


