
- Why Choose a Wooden Photo Frame for Your Living Room
- Essential Tools and Materials for Building Your Frame
- Step-by-Step Wooden Photo Frame Construction Process
- Design Ideas and Personalization Tips
- Real-Life Example and Expert Insights
1. Why Choose a Wooden Photo Frame for Your Living Room
Wooden photo frames offer a timeless elegance that complements almost any living room style. Unlike plastic or metal frames, wood brings warmth and character, creating an inviting atmosphere for your treasured photos. Additionally, wood is highly versatile—you can customize its finish, shape, and texture to perfectly suit your decor preferences.
From rustic farmhouse aesthetics to sleek modern designs, wooden frames adapt effortlessly. Choosing to build your own wooden photo frame not only adds a personal touch to your living room but also provides an opportunity to develop a rewarding DIY skill. Many homeowners find joy in crafting a frame that reflects their personality, turning a simple piece of wood into a centerpiece for memories.
1.1 The environmental advantage
Opting for sustainably sourced wood supports eco-friendly living, reducing plastic waste and chemical use. If you source reclaimed wood, your frame carries a story, enhancing its uniqueness and authenticity in your living room setting.
1.2 Cost-effectiveness and customization
Building your own wooden photo frame can be more economical than purchasing designer frames. Plus, it offers complete freedom to decide on size, color, and embellishments, making it a truly custom piece tailored for your space.
2. Essential Tools and Materials for Building Your Frame
Before starting your project, it’s crucial to gather all necessary materials and tools to ensure a smooth building process. Here’s what you’ll need:
2.1 Materials
- High-quality wood planks (pine, oak, or walnut are popular choices)
- Wood glue and finishing nails
- Sandpaper (various grits)
- Wood stain or paint (optional, for finishing)
- Glass or acrylic sheet for the frame front
- Backing board (foam board or plywood)
- Picture hanging hardware
2.2 Tools
- Miter saw or hand saw for precise 45-degree cuts
- Clamps to hold pieces while gluing
- Hammer or nail gun
- Measuring tape and pencil
- Brushes or rags for staining/painting
- Safety goggles and gloves for protection
Having these items ready will help avoid interruptions during your build and enhance the quality of the finished frame.
3. Step-by-Step Wooden Photo Frame Construction Process
Now, let’s dive into building your wooden photo frame. This section breaks down the process into clear, manageable steps, making it easy for even beginners.
3.1 Measuring and cutting the wood
Begin by measuring your photo or artwork to determine the frame size. Add extra length for the frame edges, typically around 1.5 to 2 inches wider and taller. Using your measuring tape, mark the wood planks carefully. Then, cut four pieces with precise 45-degree angles at each end using a miter saw or hand saw. Accuracy here ensures the frame fits perfectly together without gaps.
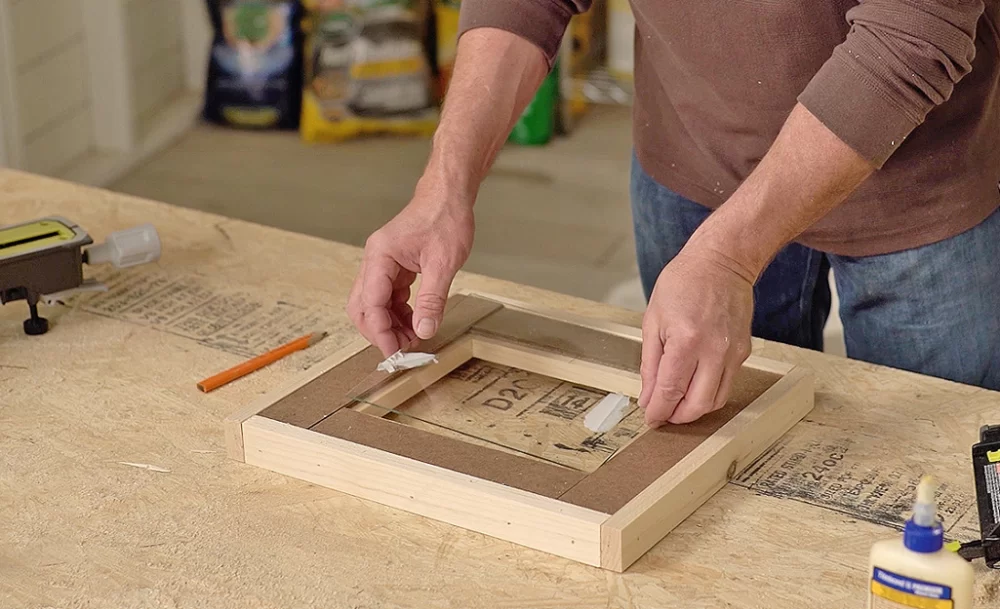
3.2 Assembling the frame
Apply wood glue along the edges of two adjoining pieces and join them to form a corner. Use clamps to hold the joints tightly and reinforce with finishing nails for durability. Repeat this for all corners until your rectangular frame is complete. Double-check for squareness by measuring the diagonals; they should be equal.
3.3 Sanding and finishing
Once assembled, sand the entire frame surface, starting with a coarser grit to remove rough edges, then progressing to finer grits for a smooth finish. If desired, apply wood stain or paint to match your living room’s color scheme. Let the finish dry thoroughly for a professional look.
3.4 Adding the glass and backing
Carefully insert the glass or acrylic sheet into the frame, followed by the backing board to secure your photo. Attach picture hanging hardware to the back, ensuring it’s strong enough to support the frame’s weight when mounted.
4. Design Ideas and Personalization Tips
To make your wooden photo frame uniquely yours, consider these creative approaches:
4.1 Rustic charm with reclaimed wood
Using reclaimed wood adds character and an eco-conscious edge to your frame. Its natural imperfections, such as knots and weathered textures, create a cozy, vintage look perfect for farmhouse or cottage-style living rooms.
4.2 Sleek modern minimalism
For a contemporary aesthetic, opt for smooth, straight lines and a simple matte finish. Choosing light-colored woods like maple or birch complements bright, airy interiors elegantly.
4.3 Adding decorative details
Incorporate decorative carvings, metal accents, or even hand-painted patterns to elevate your frame. These details showcase your personality and make the frame a conversation starter.
Remember, at Improvement, you can find expert advice and the best materials to support your DIY wooden photo frame projects, making it easier to bring your vision to life.
5. Real-Life Example and Expert Insights
Jessica, a homeowner from Seattle, shared her journey of building a wooden photo frame for her living room. She chose reclaimed barn wood to complement her rustic decor. Despite being a beginner, Jessica carefully followed the measuring and cutting steps, using clamps to hold the wood firmly during assembly. Her frame became a focal point, holding a cherished family photo that guests always admire.
Jessica emphasizes, “Taking time to sand thoroughly and choose the right finish made all the difference. The project was rewarding, and now I feel more confident tackling other woodworking crafts.”
Experts recommend beginners focus on mastering clean, precise cuts and sanding techniques to achieve a polished look. Additionally, investing in quality tools, even basic ones, can elevate your final result significantly.
For tailored recommendations on the best wood types, tools, and finishing products, Improvement offers a curated selection ideal for DIY enthusiasts at all skill levels.


