
- 1. Planning Your DIY Firewood Rack
- 2. Materials You’ll Need for Building the Firewood Rack
- 3. Step-by-Step Guide to Building a Firewood Rack
- 4. Tips for Maintaining Your Firewood Rack
- 5. Real-Life Example: A Successful DIY Firewood Rack
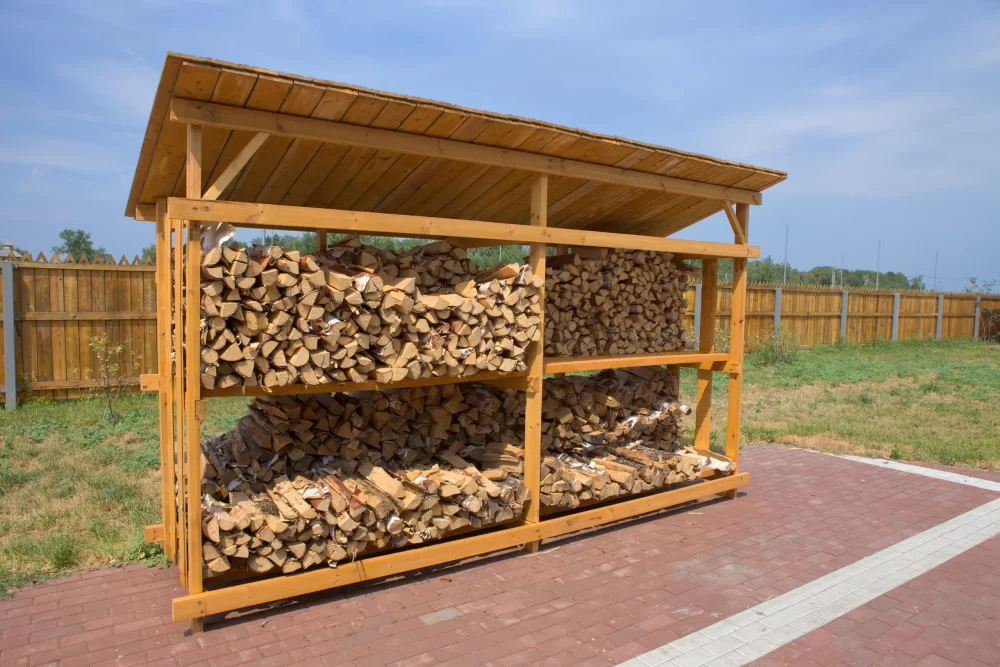
1. Planning Your DIY Firewood Rack
Building a DIY firewood rack is an excellent way to add both functionality and organization to your backyard. Before you begin, it’s important to plan the size and design of your firewood rack. Consider how much firewood you plan to store and the space available in your backyard. A firewood rack should keep your wood off the ground, allowing air to circulate, which helps prevent mold and keeps your firewood dry for easier burning. You may also want to think about whether you need a rack that’s portable or stationary, and if it needs any additional features like a roof or covering to protect the wood from rain.
2. Materials You’ll Need for Building the Firewood Rack
Gathering the right materials is key to constructing a sturdy firewood rack. The most common materials include:
- Wooden planks or lumber: For the frame and the base of the rack.
- Metal brackets or screws: To hold the frame together securely.
- Concrete blocks or bricks: To elevate the firewood off the ground (optional but recommended for ventilation).
- Tools: Saw, drill, screwdriver, measuring tape, level.
Be sure to choose materials that can withstand outdoor conditions and are strong enough to support the weight of the firewood.
3. Step-by-Step Guide to Building a Firewood Rack
Once you have your materials ready, follow these simple steps to build your DIY firewood rack:
- Measure and Cut the Lumber: Start by measuring the desired length, width, and height of your firewood rack. Cut the wooden planks according to your measurements. You’ll need four vertical supports, two horizontal beams for the top, and two for the base.
- Assemble the Frame: Using metal brackets or screws, attach the horizontal beams to the vertical supports to form a rectangular frame. Ensure that everything is level to keep the rack stable.
- Prepare the Base: If you’re using concrete blocks or bricks, arrange them under the frame to elevate the firewood. This will help prevent direct contact with moisture on the ground.
- Place the Firewood: Stack your firewood neatly on the rack, ensuring proper air circulation between the logs to prevent mold growth.
4. Tips for Maintaining Your Firewood Rack
Once your DIY firewood rack is built, it’s important to keep it well-maintained. Here are some tips to help extend the life of your firewood rack:
- Check for Damage: Regularly inspect the rack for any signs of damage, especially after a storm or heavy rain.
- Keep It Dry: Make sure the firewood stays dry by covering the top of the rack with a tarp or roof if needed.
- Stack the Wood Properly: Always stack the wood in a neat and orderly fashion to prevent it from falling and creating a mess.
5. Real-Life Example: A Successful DIY Firewood Rack
Consider the example of a homeowner who built a firewood rack to enhance their backyard and keep their wood organized for the winter. By following a similar step-by-step process, they were able to create a sturdy rack that not only helped store the wood efficiently but also added an attractive feature to their outdoor space. With careful planning and attention to detail, they now enjoy dry firewood throughout the colder months, without the hassle of messy piles scattered around their yard.
If you're ready to start your DIY firewood rack project, be sure to check out the selection of tools and materials at Improvement for the best quality products to help you get the job done!


