
- Understanding-the-Importance-of-Bathroom-Exhaust-Fans
- Preparation-Before-Installing-the-Exhaust-Fan
- Step-by-Step-Installation-Process-for-Your-New-Exhaust-Fan
- Common-Challenges-and-Professional-Tips
- Finding-the-Best-Exhaust-Fan-Products-and-Services
1. Understanding the Importance of Bathroom Exhaust Fans
Bathrooms are naturally prone to excess moisture due to frequent water use, which can lead to mold growth, unpleasant odors, and even structural damage if not properly ventilated. Installing a reliable bathroom exhaust fan is one of the most effective ways to control humidity, protect your home, and improve air quality.
Beyond moisture control, a well-chosen exhaust fan enhances comfort by quickly removing steam after showers, preventing mirror fogging, and reducing mildew risks. This is why understanding how to install a new exhaust fan in your bathroom is essential for maintaining a healthy and pleasant living space.
2. Preparation Before Installing the Exhaust Fan
2.1 Assessing Your Bathroom’s Ventilation Needs
Before installation, evaluate your bathroom size and existing ventilation setup. The fan’s capacity, measured in cubic feet per minute (CFM), should match the bathroom's square footage to effectively remove moisture. For instance, a small bathroom of 50 square feet may require a 50 CFM fan, while larger bathrooms might need fans rated at 80-110 CFM or higher.
Also, determine whether your bathroom has an existing exhaust duct or if new ductwork will be necessary. Proper venting to the outside, not just into an attic or crawl space, is critical for performance and safety.
2.2 Gathering Tools and Materials
Typical tools needed include a drill, screwdriver, wire stripper, measuring tape, drywall saw, and a voltage tester. Materials will include the exhaust fan kit, vent duct, electrical wiring, wall or roof vent caps, and mounting hardware.
Having everything ready beforehand ensures a smoother installation process.
3. Step-by-Step Installation Process for Your New Exhaust Fan
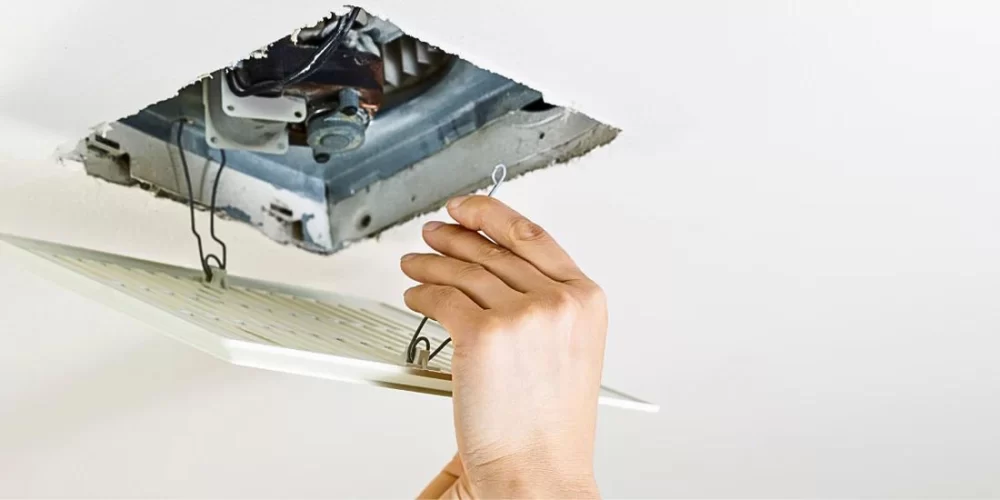
3.1 Turning Off Power and Removing Old Fan
Safety first—cut off the power supply to the bathroom at the circuit breaker. Carefully remove the old fan cover and disconnect wiring and ductwork.
3.2 Installing the New Fan Housing
Mark the position on the ceiling for the new fan, ensuring it’s centered and aligned with ductwork. Use a drywall saw to cut the opening. Install the fan housing securely between ceiling joists, following manufacturer instructions to ensure stability.
3.3 Connecting Electrical Wiring
Connect the fan’s wiring to your home’s electrical circuit using wire nuts, matching wire colors appropriately (usually black to black, white to white, and ground wires). Double-check connections for safety and use a voltage tester before proceeding.
3.4 Attaching the Ductwork
Connect the fan’s exhaust port to the ductwork leading outside. Use foil tape to seal the connection tightly to prevent air leaks. Proper duct installation ensures efficient airflow and prevents moisture buildup within walls or attic spaces.
3.5 Finishing and Testing
Attach the fan grille or cover, restore power, and test the fan operation. Listen for smooth running and check airflow from the exterior vent. Adjust or troubleshoot as needed.
4. Common Challenges and Professional Tips for a Successful Installation
4.1 Dealing with Limited Space or Difficult Access
Older homes often have cramped ceiling spaces or lack existing vent ducts, complicating installation. In such cases, consulting with professionals or seeking specialized low-profile exhaust fans can save time and ensure quality results.
4.2 Importance of Proper Venting
Incorrect venting is a common cause of failed exhaust fan systems. Venting into an attic or crawl space can cause mold and wood rot. Always ensure the duct terminates outside, ideally with a weatherproof vent cap.
4.3 Using Energy-Efficient and Quiet Models
Choosing an energy-efficient model not only saves on electric bills but often features quieter operation—a welcome benefit for small bathrooms or shared spaces. Look for ENERGY STAR-rated fans for proven efficiency.
4.4 Real-Life Case Study
A homeowner in a humid region shared how upgrading their old, noisy bathroom exhaust fan with a high-CFM, quiet, energy-efficient model made a remarkable difference. Not only did it reduce moisture-related stains on walls, but the bathroom also smelled fresher, improving overall comfort. This underscores how the right fan and proper installation matter.
5. Finding the Best Exhaust Fan Products and Services
For those looking for reliable bathroom exhaust fans and professional installation advice, Improvement offers a wide range of product recommendations tailored to different needs and budgets. Whether you prefer to DIY or hire experts, Improvement can connect you with the best solutions and trusted services to keep your bathroom fresh and dry.
Exploring expert reviews and customer feedback on Improvement ensures you choose the right product and enjoy long-term benefits from your bathroom ventilation system.


